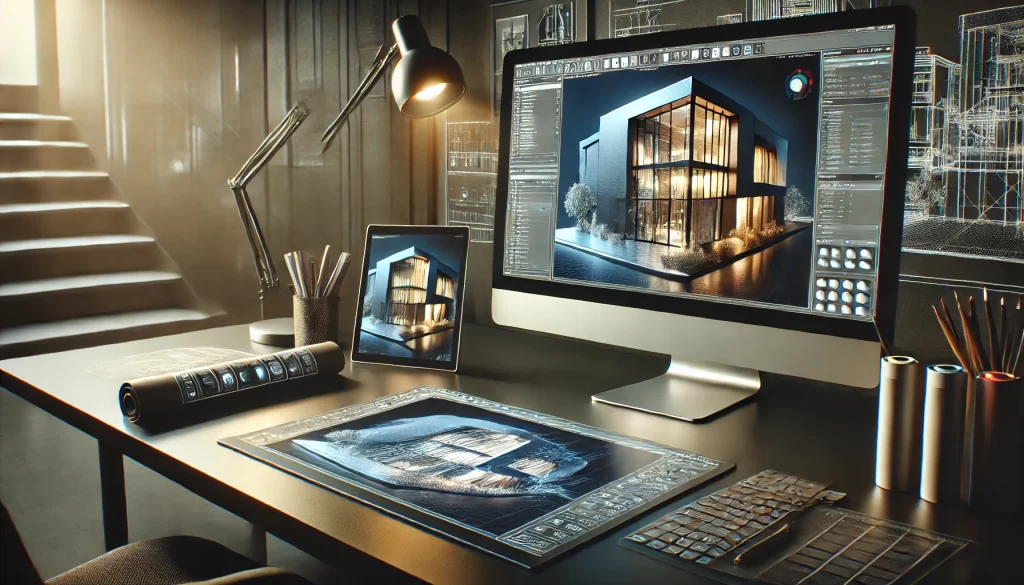
Digital rendering in 3D these days is one of the highly-used software tools for several industries – ranging from architecture, interior design, video games, and film production to product visualization. As technology evolves, so does the emerging demand gagging for a hyperrealistic representation of 3D renders. Beginners and even pro ones seeking refinement should know all this before art.
What does it mean to have photorealistic 3D renders? The key to this is mastering lighting, reflections, textures, materials, and varying performance similarities to a photographer: framing, exposure, and depth of field. In this guide, we will be describing the entire process behind rendering, providing you with a step-by-step plan that gets you ultra-realistic results.
What Is 3D Rendering?
3D rendering is the process of converting a 3D model into a 2D image by simulating how light interacts with surfaces, materials, and objects. This way, the digital model appears as lifelike as possible, making it virtually indistinguishable from a real-world object.
The Three Main Stages of 3D Rendering
Rendering involves multiple technical steps, but it can be categorized into three major stages:
- 3D Modeling – Creating the digital structure of objects using polygonal or sculpting techniques.
- Scene Setup – Adding materials, textures, lighting, and positioning objects within the scene.
- Rendering & Post-Processing – Running the final render and refining the image through post-production tools.
Mastering these stages is essential for producing high-quality renders that meet professional standards.
Why Is Realistic 3D Rendering Important?
Realistic 3D rendering plays a vital role in multiple industries by bridging the gap between imagination and reality. Here’s why it matters:
- Architecture & Interior Design – Helps architects and designers present ideas before construction, reducing errors and costs.
- Film & Gaming – Enhances storytelling by creating lifelike environments and characters.
- Marketing & Advertising – Allows companies to showcase products in high detail before production.
- Automotive & Product Design – Enables manufacturers to visualize prototypes and make adjustments early in the development process.
Current advancements in real-time rendering and AI-powered software have blurred the lines between the digital and physical worlds.
3D rendering can be quite complicated as it involves a blend of technical skill, artistic vision, and keen attention to detail. It is not merely about modeling objects in a 3D environment but involves an understanding of how light interacts with materials, how textures create realism, and how differing styles of rendering affect the quality of the image.
One of the main components of good photorealistic rendering is practicing and experimenting. Every job brings its unique challenges and decisions to be made from the choice of textures to tweaking the conditions of light. Develop a critical eye by constantly studying real-world objects, looking at conditions of light, and looking at some of the subtleties of reflections, shadows, and depth.
Steps to Making a Realistic Render
Good modeling texture, lighting, and rendering techniques form the basis for achieving photorealism in 3D renderings. Be it for architecture, genuine product designs, or visual effects, photorealism also goes with the technical sophistication and artistic feel of the engagement.
This guide will provide you with a step-by-step breakdown of how to create 3D renders that look as real as possible.
1. Understanding Client Requirements
Before starting any 3D rendering project, the most important step is to understand the client’s vision and expectations. Without this, even the most advanced renders may not align with their needs.
Key Points to Discuss with the Client:
- Purpose of the Render: Is it for marketing, interior design, product visualization, or presentations?
- Preferred Style: Does the client want a modern, traditional, or artistic approach?
- References & Inspirations: Are there real-world images or past projects to guide the design?
- Material Preferences: Specific choices for textures, colors, and finishes.
- Lighting Requirements: Should the render have natural daylight, artificial lights, or a combination?
Clarifying these details ensures the final output meets expectations without excessive revisions.
2. Analyzing the Project & Planning the Workflow
Once you understand the requirements, the next step is structuring the workflow to ensure a smooth rendering process. Proper planning saves time, prevents mistakes, and optimizes efficiency.
How to create 3D renderings effectively:
- Define the Scene Layout – Decide on the best camera angles, composition, and focal points.
- Gather Real-World References – Using real-life images helps in achieving accurate proportions, materials, and lighting.
- Select the Right Software – Choose from industry-standard tools like Blender, 3ds Max, V-Ray, Unreal Engine, or Corona Renderer based on project needs.
- Estimate the Time & Resources Needed – Consider render times, model complexity, and client revisions.
A well-thought-out plan ensures the entire project progresses smoothly and efficiently.
3. Building a High-Quality 3D Model
The foundation of any realistic render is a well-structured, accurate 3D model. If the base geometry lacks quality, no amount of texturing or lighting can compensate.
Best Practices for 3D Modeling:
- Work with Real-World Scale & Proportions – Always model with accurate measurements to maintain realism.
- Keep Geometry Clean & Optimized – Avoid unnecessary polygons to enhance performance and efficiency.
- Use Bevels & Rounded Edges – In reality, very few objects have perfectly sharp edges. Slight rounding makes surfaces look natural.
- Model Fine Details Only Where Necessary – Overcomplicating small, distant elements can slow down rendering without adding visual benefits.
A solid, well-structured model is the key to a lifelike and visually appealing render.
4. Applying Realistic Textures & Materials
Even a perfectly modeled object will look fake if its materials and textures lack realism. Proper texturing ensures surfaces react to light naturally and display fine details.
How to Achieve High-Quality Textures:
- Use High-Resolution Texture Maps – Low-quality textures create pixelation and unrealistic surfaces.
- Correct UV Mapping – Poorly mapped textures cause stretching or misalignment.
- Add Roughness, Normal, and Bump Maps – These add depth and fine surface details.
- Match Real-World Material Properties – Observe how actual materials reflect light and mimic their behavior.
Using advanced tools like Substance Painter, Photoshop, or Quixel Megascans can greatly improve texture quality.
5. Setting Up Realistic Lighting
Lighting is one of the most critical factors in making a render look real. Even with high-quality models and textures, improper lighting can make a scene look artificial.
Lighting Techniques for Realistic Renders:
- Use HDRI Maps for Natural Lighting – HDRI images provide realistic global illumination and reflections.
- Balance Artificial & Natural Light Sources – A well-balanced combination prevents overexposed or dull areas.
- Adjust Shadow Softness & Light Intensity – Overly sharp shadows or extremely bright highlights can reduce realism.
- Match Real-World Lighting Conditions – Study how lighting behaves in photographs and real environments.
Lighting should enhance the mood, depth, and realism of the scene.
6. Rendering the Project with Proper Settings
The rendering phase brings everything together into a final, high-quality image. However, without proper settings and optimization, even a great scene can result in poor-quality output.
How to Optimize Renders:
- Choose the Right Render Engine – V-Ray, Corona, or Octane for photorealism, and Blender Cycles for detailed visuals.
- Increase Sampling & Reduce Noise – Higher samples produce smoother, noise-free images.
- Optimize Reflection & Refraction Settings – Avoid excessive reflections, as they increase render time without always adding realism.
- Render in Passes – Separate elements like shadows, highlights, and ambient occlusion for better post-processing.
Setting up the correct render settings is essential for achieving a high-quality final image.
7. Refining the Render in Post-Production
Even after rendering, the final image often needs additional refinements to perfect the realism. Post-processing helps enhance colors, depth, and overall presentation.
Post-Processing Techniques:
- Adjust Color Balance & Contrast – Ensure natural-looking brightness and shadows.
- Apply Depth of Field (DOF) – Slight background blurring mimics real camera focus.
- Fix Exposure & Lighting Issues – Adjust highlights and shadows for a balanced look.
- Add Subtle Effects – Film grain, vignettes, and bloom enhance realism.
Professional software like Photoshop, After Effects, or Lightroom can be used for final adjustments.
Key Takeaways for a Successful 3D Rendering Workflow
To summarize the most important factors in achieving high-quality renders, keep the following principles in mind:
- Precision in 3D Modeling – The foundation of any great render starts with an accurate, well-optimized model.
- Mastering Materials & Textures – Using PBR materials and detailed texture maps enhances realism.
- Realistic Lighting Setup – Understanding HDRI, three-point lighting, and global illumination makes a significant difference.
- Optimized Render Settings – Balancing quality and performance is key to producing high-resolution results without excessive rendering times.
- Post-Processing & Refinements – Color correction, depth of field, and subtle effects help achieve a professional, polished look.
The Path to Becoming a Rendering Expert
Becoming a master in 3D rendering is a continuous journey. Professionals spend years refining their skills, learning new software, rendering engines, and artistic techniques to create visuals that push the boundaries of realism. Whether you are working in architectural visualization, game development, VFX, or product design, the key is to keep practicing, experimenting, and adapting to new industry standards.
By following this step-by-step guide and staying committed to learning, you can develop the ability to create hyper-realistic 3D renders that rival real-life photography. Keep pushing your creative limits, explore new rendering technologies, and most importantly, enjoy the process of bringing digital worlds to life.